
07/27/2023

In a world where our lives are increasingly intertwined with technology, parting ways with our devices can be both freeing and nerve-wracking. If you find yourself preparing to say goodbye to your MacBook, whether it's for an upgrade or sale, one critical task demands your attention: removing the iCloud from your MacBook. While it may seem like a straightforward process, a lot of people forget to take care of this before sending off their MacBook.
In this article, we go over the step-by-step process of how to remove your iCloud account. If you plan to sell your MacBook Air, make sure to remove iCloud first so your data stays protected and the device is fully ready for resale. By following these essential guidelines, you can ensure that your personal information remains yours alone and that your selling process will be smooth.
If your MacBook is running macOS Ventura, the best and easiest way to remove your iCloud from your MacBook is to erase it completely. Following these simple steps will ensure that when you send your MacBook in to be processed there will be no traces of your information left on it.
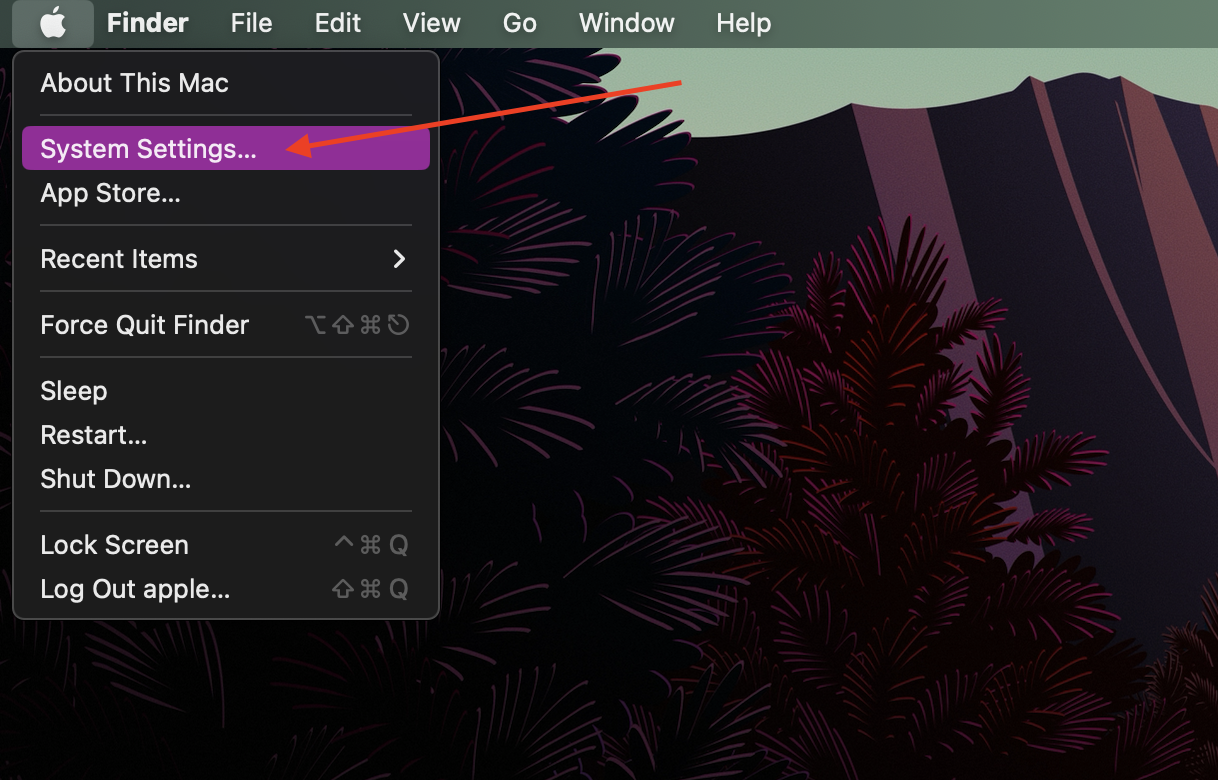
There are two ways you can open "System Settings". The first way would be to look at your dock and click the "System Settings" icon. Since docks are customizable, this icon may not be there. In this case you would click the Apple logo on the top left corner of your screen and then click "System Settings".
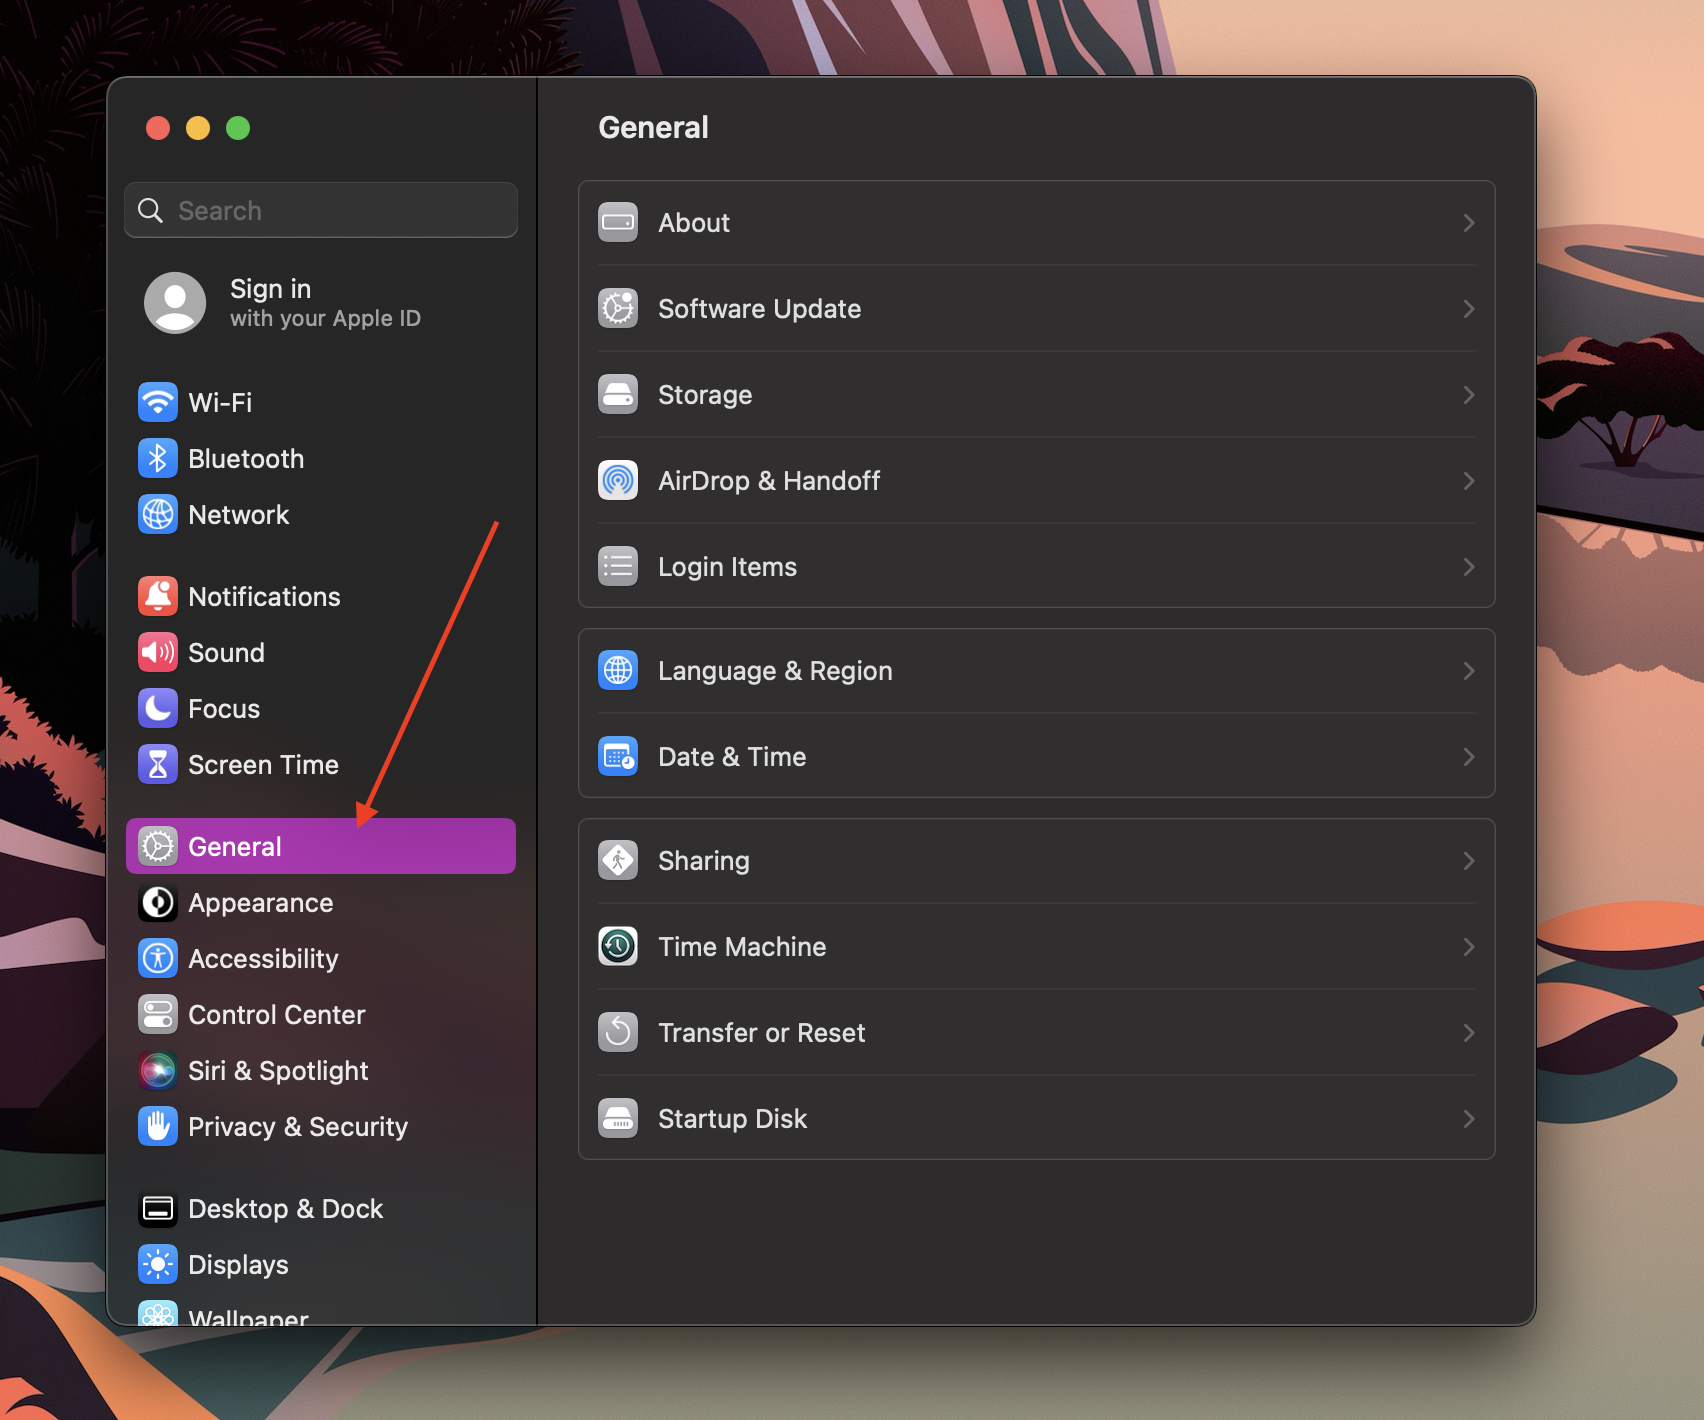
On the left side of the "System Settings" window, there will be an option labeled "General". Click this to open general settings for your MacBook.
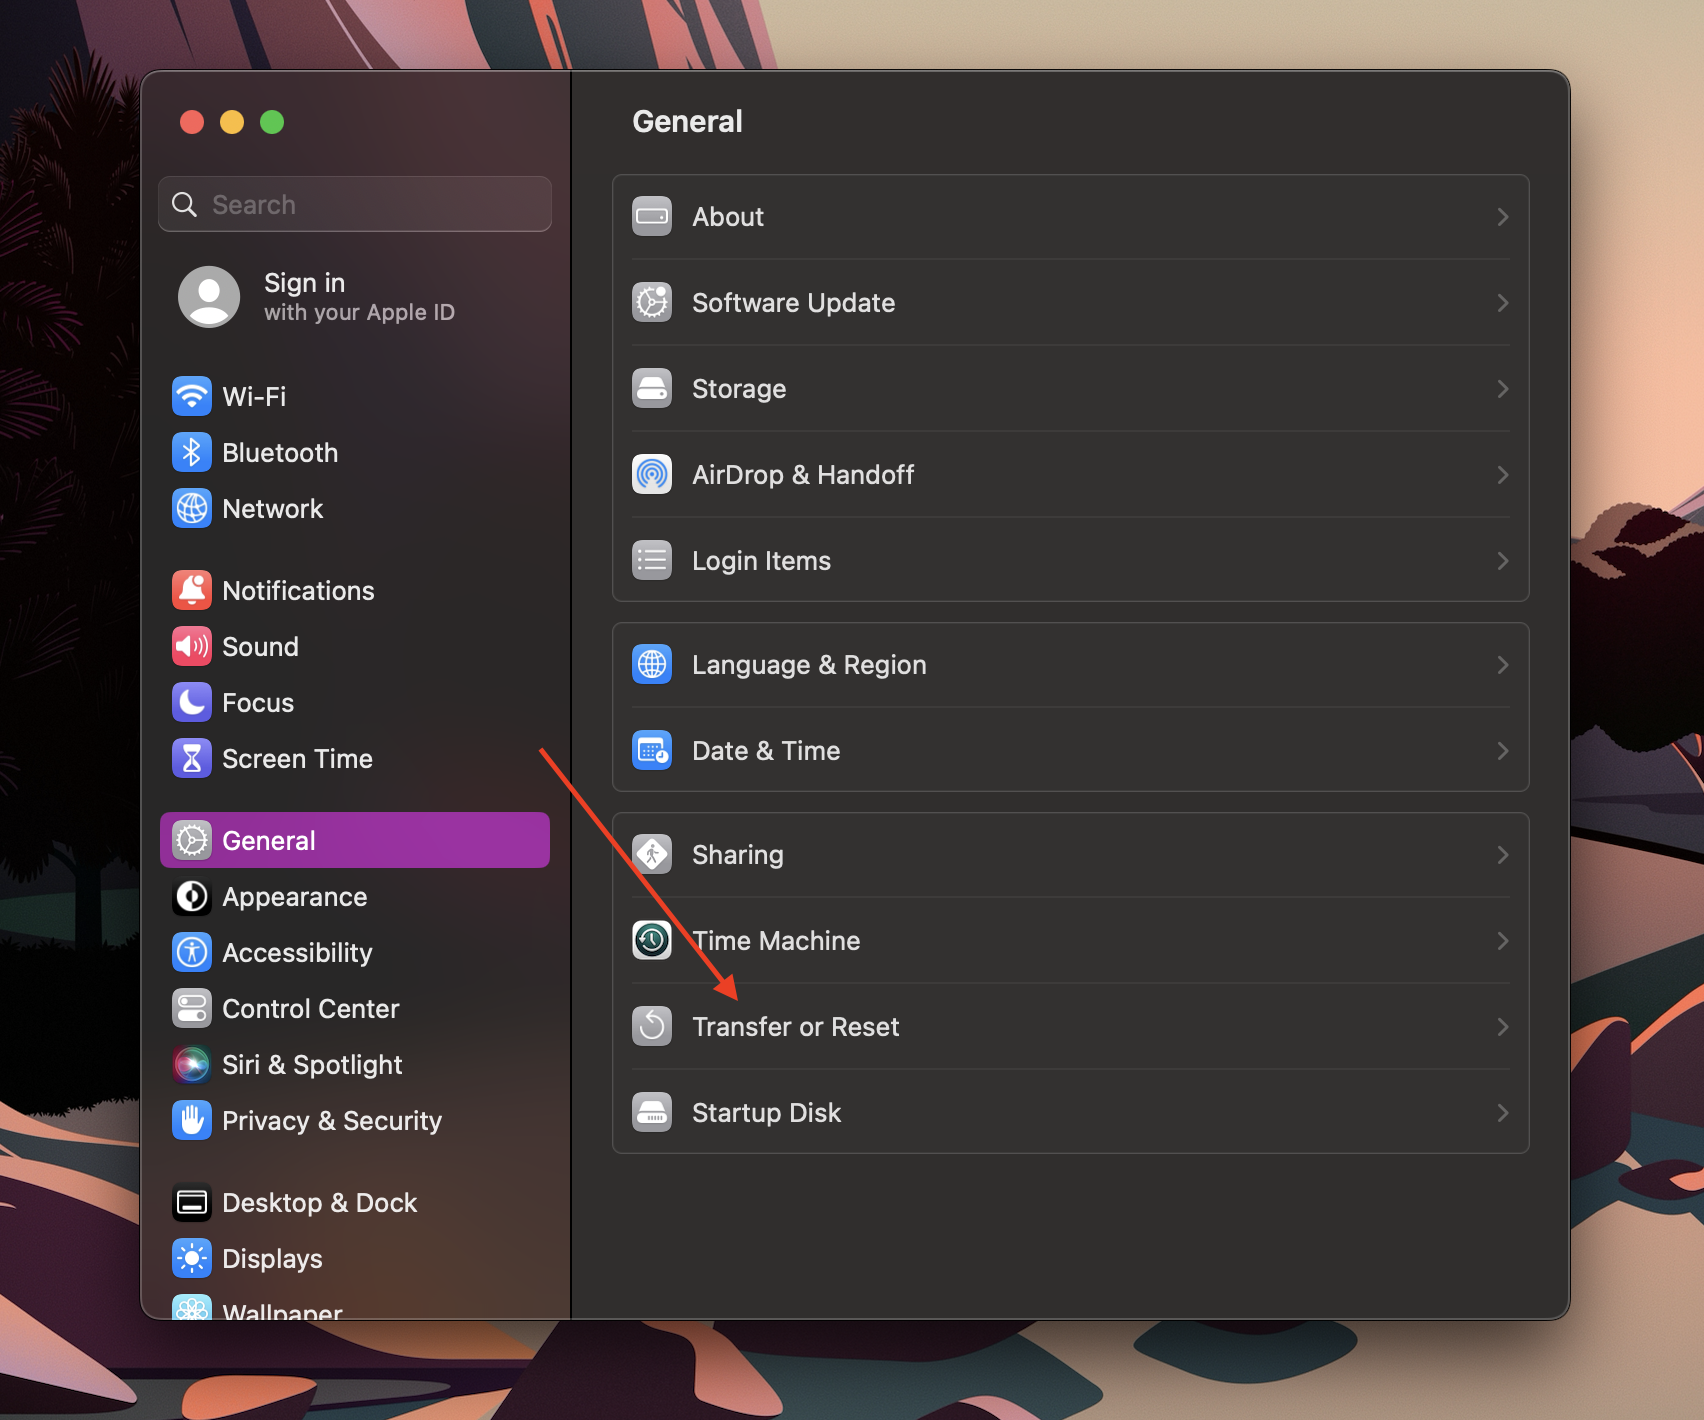
In the list of options that appears in this window, there will be a selection titled "Transfer or Reset". Click this to open the window to erase your MacBook.
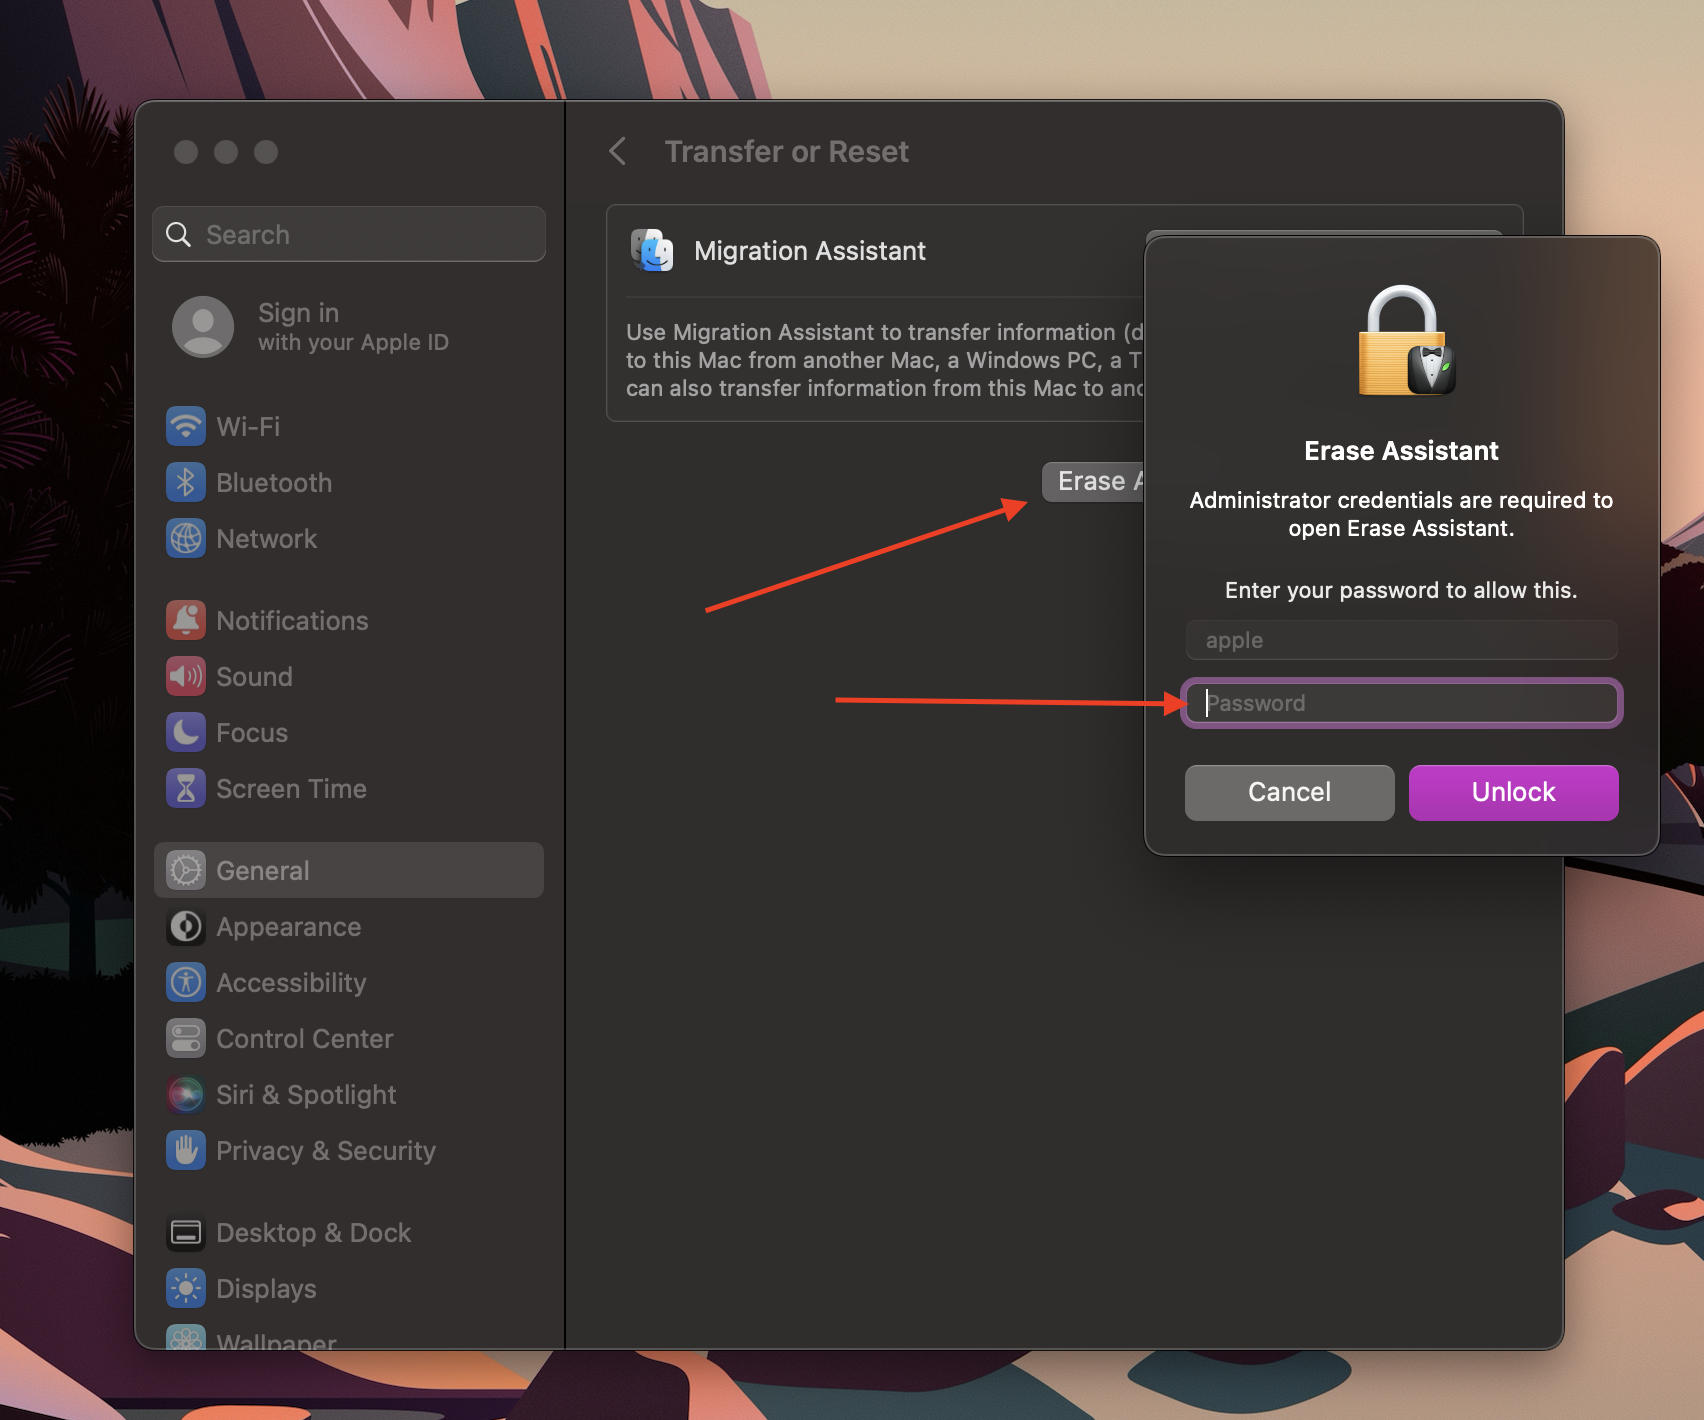
In this window there will be an option that says "Erase All Content and Settings". A new window will open prompting you to enter the password you use to unlock your MacBook. Enter your password and then hit return or click "Unlock". In the next window click continue.
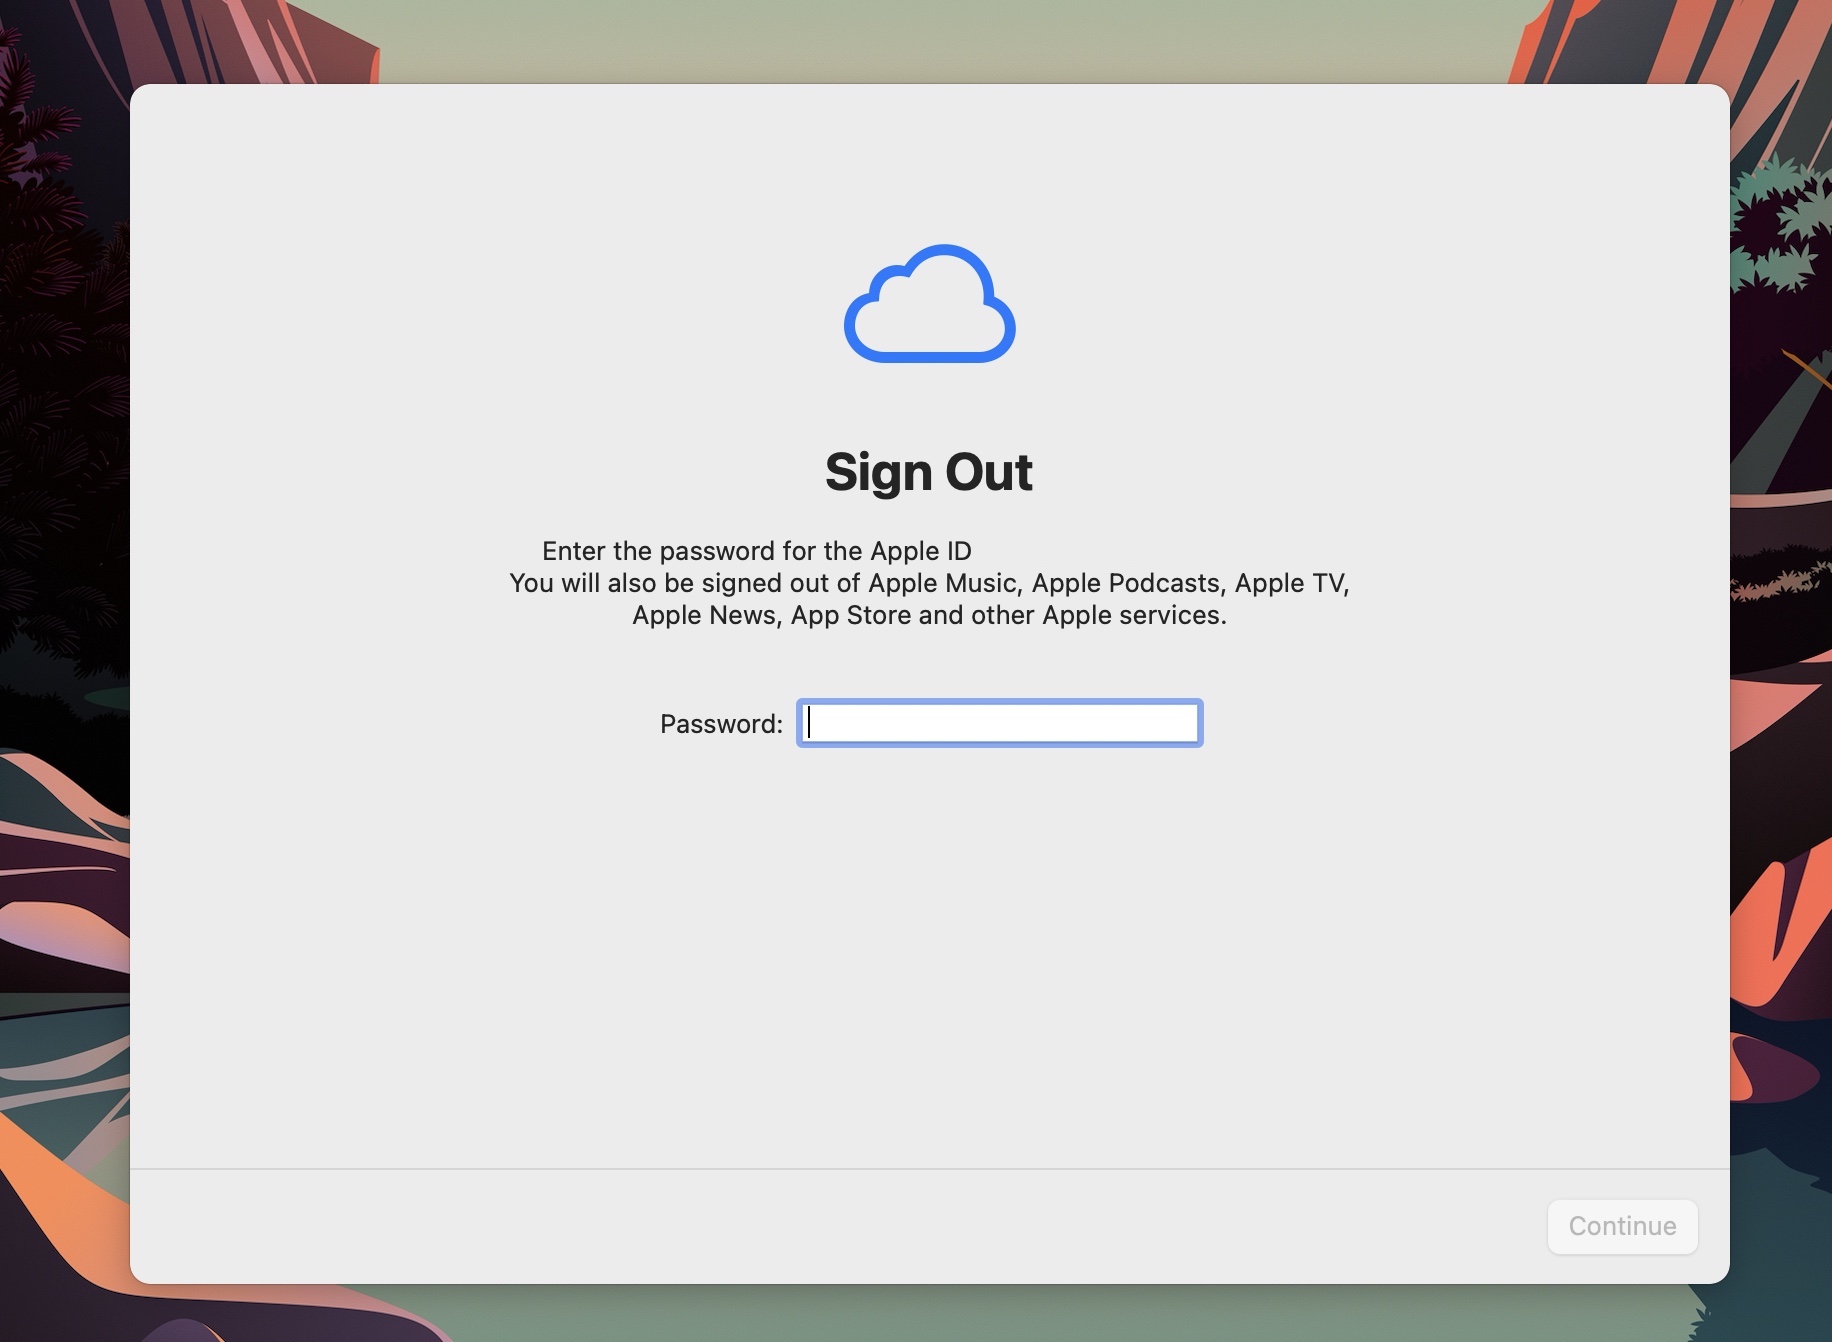
In the next window that appears you will be prompted to enter the password you use for your iCloud account. Enter this password and then click continue. In the new window that appears click "Erase All Content and Settings". This should be written in red.
At this point your MacBook should reset and show the Apple logo on the screen. Once this process is done your MacBook should be on the "Hello" screen. Once you see that you should be all set and your MacBook is ready to be sent in to us. The MacBook may chime a few times before loading in to the welcome page. This is normal and should load up when it is done.
Some older MacBooks may be running an earlier OS like Monterey, Big Sur, or Catalina. If your MacBook is running any of these or an even earlier version, there is a very simple way to remove the iCloud account from your MacBook.

Similar to the first step you would take for MacBooks running macOS Venture, you will first have to open "System Preferences". You can do this by either clicking the grey icon in your dock or clicking the Apple logo on the top left corner of your screen and then selecting “System Preferences” from the drop down menu.
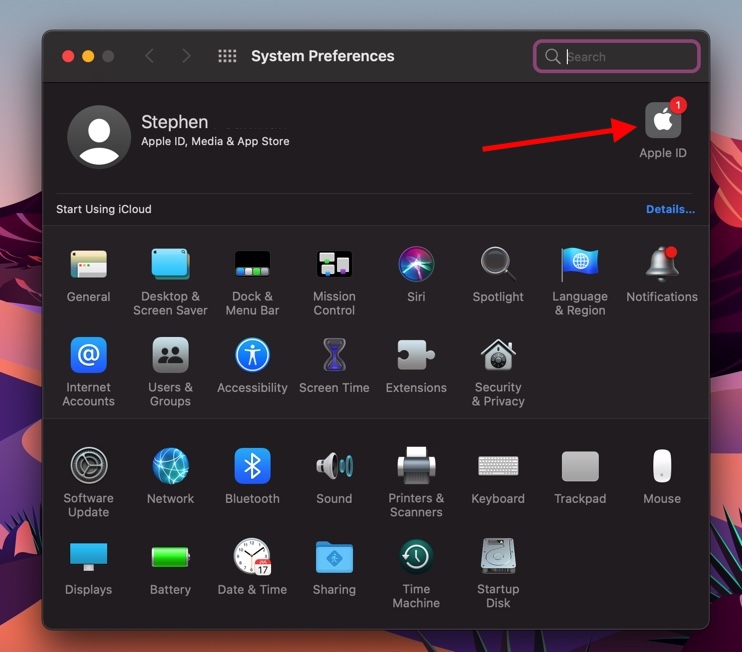
On the top row of your "System Preferences" window you should see your name and then the buttons for "Apple ID" and "Family Sharing". Click the option for “Apple ID”. If you do not see your name and it says "Sign into iCloud" then you do not need to do anything further since there is no iCloud account associated with the MacBook.
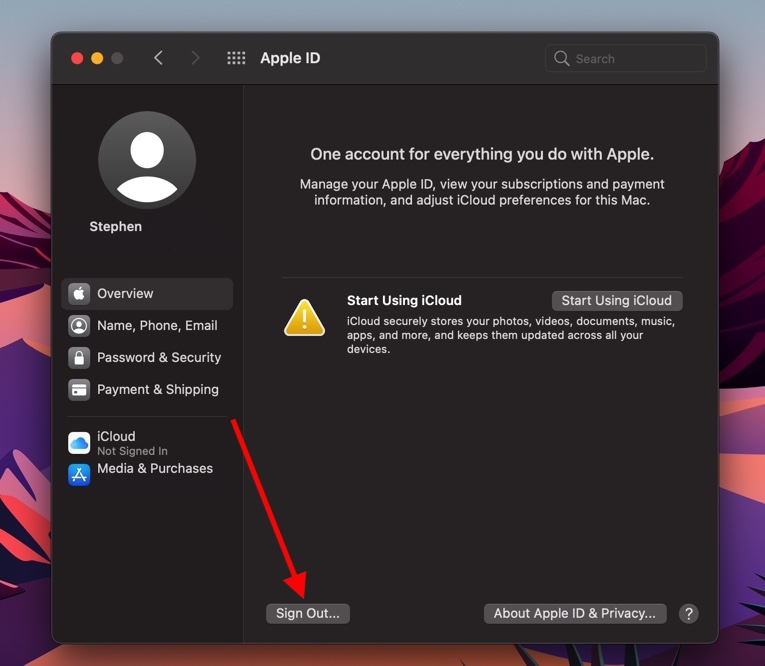
In this new page, look for "Overview" on the left side. Once you find this option, click it to see an overview of your iCloud account. On the bottom of this page there will be a button that says "Sign Out…". Click this button and then in the new window uncheck any boxes that may be checked as you do not want to keep a copy of anything on the MacBook and then click "Continue".
Once you have done this the window should close and the MacBook should finish signing out of your iCloud account. The window will change and ask you to signs into your iCloud Account. Once you have reached this step you are all done and the MacBook is ready to be sold!
While it may seem like something you would remember to do before sending your MacBook or MacBook Pro out, a lot of people overlook this step leaving all of their information on the MacBook. When a MacBook comes in that is locked to an iCloud account, it can make the processing time longer since we have to wait to go over the MacBook until the iCloud account is removed remotely.